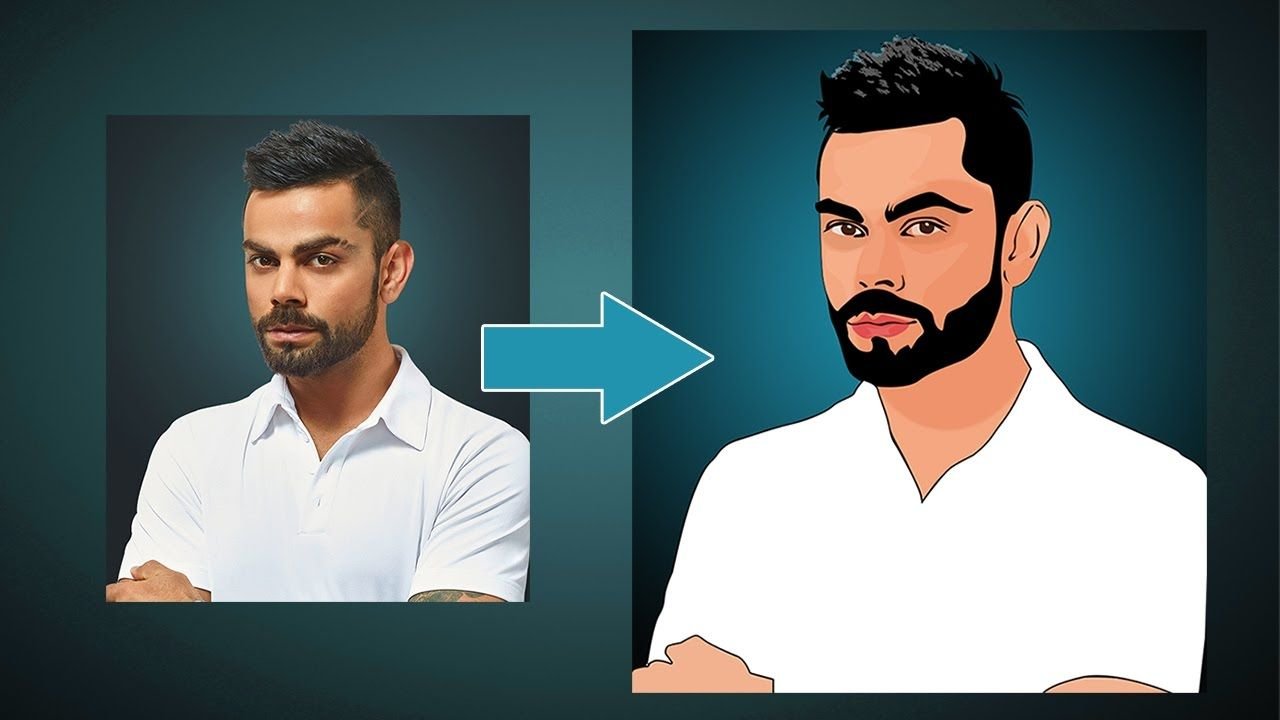
Cartooning is a fascinating art form that brings your photos to life with a touch of whimsy and creativity. Whether you want to turn a cherished memory into a playful cartoon or simply explore a new artistic hobby, learning how to convert your photos into cartoons can be an exciting and rewarding experience Convert picture to cartoon. In this guide, we’ll walk you through the step-by-step methods to transform your photos into captivating cartoons.
Why Cartooning?
Cartooning is more than just a fun way to manipulate images; it’s a form of artistic expression that allows you to see the world through a different lens. Converting your photos into cartoons can add a unique, personalized touch to your images, making them stand out in a sea of ordinary photographs. Plus, it’s a great way to enhance your creativity and experiment with different styles and techniques.
Getting Started: What You Need
Before diving into the cartooning process, you’ll need a few essential tools:
- A High-Quality Photo: Start with a clear, high-resolution image to achieve the best results.
- Photo Editing Software: Tools like Adobe Photoshop, Corel Painter, or free alternatives like GIMP can be used to convert your photos into cartoons.
- A Graphics Tablet (Optional): While not necessary, a graphics tablet can make the cartooning process more precise and enjoyable.
Step 1: Choose the Right Photo
The first step in creating a cartoon is selecting the right photo. Look for an image with good lighting, clear features, and a clean background. Portraits work exceptionally well, but you can experiment with any photo that inspires you.
Step 2: Prepare Your Image
Once you’ve selected your photo, it’s time to prepare it for cartooning:
- Crop and Resize: Trim any unnecessary parts of the image and resize it to your desired dimensions.
- Adjust Brightness and Contrast: Enhance the photo by adjusting the brightness and contrast to make the details more prominent.
Step 3: Outline the Image
Outlining is a crucial step in cartooning. It defines the shapes and features that will make up your cartoon:
- Use a Pen Tool: In your photo editing software, use the pen tool to create clean, smooth outlines around the subject. Pay attention to facial features, clothing, and other important elements.
- Create New Layers: Work on separate layers for each part of the image (e.g., face, hair, clothing). This makes it easier to edit and add color later.
Step 4: Add Color
Coloring is where your cartoon truly comes to life:
- Choose a Color Palette: Select a color palette that matches the mood you want to convey. You can use bold, vibrant colors for a playful look or softer tones for a more subdued cartoon.
- Paint with a Brush Tool: Use the brush tool to fill in the colors on each layer. Be patient and take your time to ensure smooth, even coloring.
- Add Shading and Highlights: To add depth to your cartoon, incorporate shading and highlights. This can be done by selecting darker and lighter shades of your base colors and applying them strategically.
Step 5: Add Details and Effects
The details and effects you add will give your cartoon a professional touch:
- Enhance Features: Add details like shadows, textures, and reflections to enhance the overall appearance.
- Apply Filters: Experiment with different filters, such as posterization or Gaussian blur, to give your cartoon a unique look.
- Add Background Elements: If your photo has a plain background, consider adding elements like clouds, trees, or abstract patterns to make the cartoon more dynamic.
Step 6: Final Touches and Export
Before completing your cartoon, review the image for any final adjustments:
- Check for Consistency: Ensure that the colors, lines, and details are consistent throughout the image.
- Merge Layers: Once satisfied with the results, merge the layers to create a cohesive cartoon.
- Export Your Cartoon: Save your cartoon in a high-resolution format like PNG or JPEG, ready to be shared or printed.
Experiment and Have Fun
Cartooning is an art that thrives on creativity and experimentation. Don’t be afraid to try different techniques, play with colors, and push the boundaries of your imagination. With practice, you’ll develop your own style and become more confident in converting photos into captivating cartoons.
Conclusion
Converting your photos into cartoons is a fun and artistic way to breathe new life into your images. By following these step-by-step methods, you’ll be able to create unique and personalized cartoons that capture the essence of your photos while adding a creative twist. So grab your favorite photo, fire up your editing software, and start discovering the art of cartooning today!
To learn more about how to convert photo to cartoon visit site now